Monday 28 October 2013
Windows 8.1 now available!
Less than a year ago we were preparing to
launch Windows 8, which introduced our vision of highly personalized
mobile computing. And here we are today announcing the global
availability of Windows 8.1. Windows 8.1 demonstrates our commitment to
continuously improving the product to create a richer customer
experience. We are excited to have customers start updating their
devices today and getting to experience new Windows devices this holiday
season.
Windows 8.1 brings a variety of new features and improvements to Windows 8 that we think people will really enjoy. We listened to your feedback and are delivering many of the improvements you asked for.
If you are a consumer with a Windows 8 device, you can now download the free update to Windows 8.1 online through the Windows Store*. Please visit Windows.com for everything you need to know including how to get the update for your Windows 8 device. If you are a consumer on a device running Windows 7, Windows Vista, Windows XP, or the Windows 8.1 Preview – this page on Windows.com will detect your OS and provide you with all the information you need in order to get Windows 8.1 on your device. I also highly recommend reading our FAQ which answers many of the most common questions about getting Windows 8.1.
Starting tomorrow October 18th, Windows 8.1 will also be available on new devices and as packaged DVD product at retail locations around the world. You can also click here to learn about the wide variety of new Windows devices available now and coming throughout the holiday season to find the one that best fits their needs, and their budget.
To celebrate the new Windows, starting today for the next 8 days – we will pick 810 (see what we did there?) random winners per day who tweet and share their new Start screen after updating their Windows 8 device to Windows 8.1 with the #MyStart hashtag.

To take a screenshot of your Start screen in Windows 8.1, open up the Share charm from your Start screen and tap or click the down arrow next to “Start” and choose “Screenshot” (shown above). Alternatively, you can press the Windows logo key + PrtScn on your keyboard or if you're using a tablet, press the Windows logo button + the volume down button.
Winners will receive a $10 promotional Windows Store gift card to get started with great Windows apps and games. Click here for the full terms and conditions for the sweepstakes including how to redeem your gift card if you are a winner. Winners will be informed via Direct Message on Twitter. This sweepstakes is for participants in the U.S. only. However, we would still love to see Start screens from people around the world and in different languages!
We will also be hosting an IAmA chat on reddit today with several of our engineers to answer your questions about Windows 8.1 from 10:30am to 12:00pm (PST). Our engineers are excited to answer your questions about many of the new features and improvements in Windows 8.1 (see more below on these features and improvements). Please note this will not be the appropriate place to seek help with any issues you may have had with getting Windows 8.1 on your device – the best place for assistance with your issues will be the Microsoft Community forums.
After our reddit chat, we will host a special Tech Thursday Live Twitter Chat to discuss Windows 8.1 from 12:00pm to 1:00pm (PST). Join @Windows, @kristinalibby, and myself (@brandonleblanc) for the chat. To participate in the chat, just use our normal #winchathashtag. We look forward to seeing some of your new Start screens from Windows 8.1! I’m planning to share my Start screen but you’ll have to attend our chat to see it as I’m still finishing up making it look epic.
You’ve heard us (and me) talk a lot about the new features in Windows 8.1 since the Build conference last June but I think it’s worth reiterating the awesomeness that Windows 8.1 brings to your device.


Start the way you want. The Start screen in Windows 8.1 is more customizable than ever with new tile sizes, new background designs and colors – allowing you to make the Start screen on your device unique and personal to you (you should see some of the color combinations I’ve come up with for my Start screen!). You can also choose how you start your Windows experience – at the Start screen or the desktop. The Start button is back. And there is an improved Apps view that allows you to see all your apps the way you want.

Multi-tasking is even better in Windows 8.1 – you can now have up to four apps side by side with flexible windows sizing for each app on the screen. At a minimum, I usually have 3 apps snapped side by side on my devices doing various things like email, listening to music and browsing the web. We have also improved multi-monitor support in Windows 8.1 allowing users to view their desktop or apps from the Windows Store on any or all their monitors.

Bing Smart Search is the easiest way to find what you are looking for and to get things done. Built for touch, swipe or type from the Start screen and Smart Search will find what you need – whether it’s a document on your PC, a photo album in the cloud, your favorite app, or a website.


Windows 8.1 comes with new and improved Microsoft apps and services – available right out of the box and right from your Start screen. Skype is there for instant messaging and catching up with friends and family. We’ve updated the Mail app (well, more like over-hauled) to make email easier – for both personal and email and work email. Two new Bing apps are introduced in Windows 8.1 called Food & Drink and Health & Fitness along with updates to the News, Weather, Finance, Travel and Sports apps. Xbox Music has received a big update for Windows 8.1, and you can watch TV and movies with Xbox Video. And Windows 8.1 comes with Internet Explorer 11which is optimized for touch and brings speed boosts and synchronized browsing history, favorites, and settings across all of your Windows 8.1 devices.

Speaking of synchronizing – Windows 8.1 also comes with deep and improved cloud integration with SkyDrive. Your files are always accessible across all your devices. With SkyDrive smart files, you can create, edit, save and share files anywhere, anytime and your files are always with you, both on and offline.

And the Windows Store has been redesigned in Windows 8.1. With the “New & Rising” section it is now easier to stay on top of the hottest and newest apps to hit the Windows Store. Plus, the Windows Store has a live tile too! The Windows Store will also now provide you with personalized recommendations – powered by Bing. And apps are now updated from the Windows Store automatically by default so you will always have the best and newest versions of your apps. Look for new and updated apps including Adobe Photoshop Express, Box, Evernote, Facebook, Hulu Plus, Netflix, and NOOK, for Windows 8.1. And more to come!
Windows 8.1 will also bring some very innovative new devices for both consumers and businesses from tablets and 2-in-1s with a perfect mix of mobility and productivity, to new laptops, All-in-Ones and specialized industry devices Windows 8.1 brings the widest selection of designs at every price point. I’ll be blogging more about many of these devices over the next few weeks as they become available, so you can find and experience a device that is truly an extension of you.
Windows 8.1 represents collaboration across the entire company. Over the last three days, we’ve featured guest blog posts from our friends at Skype, Xbox, Bing, SkyDrive, and Internet Explorer that discusses in the connected experience that Windows 8.1 brings together.
And now you can enjoy the results of this work today. So get your device updated! And be sure to share those Start screens.
*Internet access required; fees may apply.
Windows 8.1 brings a variety of new features and improvements to Windows 8 that we think people will really enjoy. We listened to your feedback and are delivering many of the improvements you asked for.
If you are a consumer with a Windows 8 device, you can now download the free update to Windows 8.1 online through the Windows Store*. Please visit Windows.com for everything you need to know including how to get the update for your Windows 8 device. If you are a consumer on a device running Windows 7, Windows Vista, Windows XP, or the Windows 8.1 Preview – this page on Windows.com will detect your OS and provide you with all the information you need in order to get Windows 8.1 on your device. I also highly recommend reading our FAQ which answers many of the most common questions about getting Windows 8.1.
Starting tomorrow October 18th, Windows 8.1 will also be available on new devices and as packaged DVD product at retail locations around the world. You can also click here to learn about the wide variety of new Windows devices available now and coming throughout the holiday season to find the one that best fits their needs, and their budget.
To celebrate the new Windows, starting today for the next 8 days – we will pick 810 (see what we did there?) random winners per day who tweet and share their new Start screen after updating their Windows 8 device to Windows 8.1 with the #MyStart hashtag.

To take a screenshot of your Start screen in Windows 8.1, open up the Share charm from your Start screen and tap or click the down arrow next to “Start” and choose “Screenshot” (shown above). Alternatively, you can press the Windows logo key + PrtScn on your keyboard or if you're using a tablet, press the Windows logo button + the volume down button.
Winners will receive a $10 promotional Windows Store gift card to get started with great Windows apps and games. Click here for the full terms and conditions for the sweepstakes including how to redeem your gift card if you are a winner. Winners will be informed via Direct Message on Twitter. This sweepstakes is for participants in the U.S. only. However, we would still love to see Start screens from people around the world and in different languages!
We will also be hosting an IAmA chat on reddit today with several of our engineers to answer your questions about Windows 8.1 from 10:30am to 12:00pm (PST). Our engineers are excited to answer your questions about many of the new features and improvements in Windows 8.1 (see more below on these features and improvements). Please note this will not be the appropriate place to seek help with any issues you may have had with getting Windows 8.1 on your device – the best place for assistance with your issues will be the Microsoft Community forums.
After our reddit chat, we will host a special Tech Thursday Live Twitter Chat to discuss Windows 8.1 from 12:00pm to 1:00pm (PST). Join @Windows, @kristinalibby, and myself (@brandonleblanc) for the chat. To participate in the chat, just use our normal #winchathashtag. We look forward to seeing some of your new Start screens from Windows 8.1! I’m planning to share my Start screen but you’ll have to attend our chat to see it as I’m still finishing up making it look epic.
You’ve heard us (and me) talk a lot about the new features in Windows 8.1 since the Build conference last June but I think it’s worth reiterating the awesomeness that Windows 8.1 brings to your device.


Start the way you want. The Start screen in Windows 8.1 is more customizable than ever with new tile sizes, new background designs and colors – allowing you to make the Start screen on your device unique and personal to you (you should see some of the color combinations I’ve come up with for my Start screen!). You can also choose how you start your Windows experience – at the Start screen or the desktop. The Start button is back. And there is an improved Apps view that allows you to see all your apps the way you want.

Multi-tasking is even better in Windows 8.1 – you can now have up to four apps side by side with flexible windows sizing for each app on the screen. At a minimum, I usually have 3 apps snapped side by side on my devices doing various things like email, listening to music and browsing the web. We have also improved multi-monitor support in Windows 8.1 allowing users to view their desktop or apps from the Windows Store on any or all their monitors.

Bing Smart Search is the easiest way to find what you are looking for and to get things done. Built for touch, swipe or type from the Start screen and Smart Search will find what you need – whether it’s a document on your PC, a photo album in the cloud, your favorite app, or a website.

Windows 8.1 comes with new and improved Microsoft apps and services – available right out of the box and right from your Start screen. Skype is there for instant messaging and catching up with friends and family. We’ve updated the Mail app (well, more like over-hauled) to make email easier – for both personal and email and work email. Two new Bing apps are introduced in Windows 8.1 called Food & Drink and Health & Fitness along with updates to the News, Weather, Finance, Travel and Sports apps. Xbox Music has received a big update for Windows 8.1, and you can watch TV and movies with Xbox Video. And Windows 8.1 comes with Internet Explorer 11which is optimized for touch and brings speed boosts and synchronized browsing history, favorites, and settings across all of your Windows 8.1 devices.

Speaking of synchronizing – Windows 8.1 also comes with deep and improved cloud integration with SkyDrive. Your files are always accessible across all your devices. With SkyDrive smart files, you can create, edit, save and share files anywhere, anytime and your files are always with you, both on and offline.

And the Windows Store has been redesigned in Windows 8.1. With the “New & Rising” section it is now easier to stay on top of the hottest and newest apps to hit the Windows Store. Plus, the Windows Store has a live tile too! The Windows Store will also now provide you with personalized recommendations – powered by Bing. And apps are now updated from the Windows Store automatically by default so you will always have the best and newest versions of your apps. Look for new and updated apps including Adobe Photoshop Express, Box, Evernote, Facebook, Hulu Plus, Netflix, and NOOK, for Windows 8.1. And more to come!
Windows 8.1 will also bring some very innovative new devices for both consumers and businesses from tablets and 2-in-1s with a perfect mix of mobility and productivity, to new laptops, All-in-Ones and specialized industry devices Windows 8.1 brings the widest selection of designs at every price point. I’ll be blogging more about many of these devices over the next few weeks as they become available, so you can find and experience a device that is truly an extension of you.
Windows 8.1 represents collaboration across the entire company. Over the last three days, we’ve featured guest blog posts from our friends at Skype, Xbox, Bing, SkyDrive, and Internet Explorer that discusses in the connected experience that Windows 8.1 brings together.
And now you can enjoy the results of this work today. So get your device updated! And be sure to share those Start screens.
*Internet access required; fees may apply.
Tuesday 24 September 2013
Windows 8 Shortcuts to Bypass the Elongated Routes
Windows 8, according to some perspectives, is considered to be challenging in use. Many functions have been relocated and many new features are not visible and recognized. A new user logged into Windows 8 is similar to child caught in a maze. To avoid such confusions, this article is concentrated on the Shortcut keys, through which one can easily bypass the standard route to access a function or application. Described following are some of the brought out shortcuts for a convenient handling.

FUNCTION 1: START SCREEN
There is no visible button or icon on the front desktop screen, which could take the user to the tiled Start screen. The user has to scroll the mouse to the corner for viewing the Charm bar.
SHORTCUT: Windows key
FUNCTION 2: MINIMIZE
Windows has an impeccable interface for multi-tasking. A user can open, view, and operate many applications at a time. Minimizing these applications one after another is often felt irritating.
SHORTCUT: Windows key + M
FUNCTION 3: RUNNING PROGRAMS
A user might be engaged with many applications at a time. Counting at the taskbar to know the status may be a bit difficult.
SHORTCUT: Windows key + Tab
FUNCTION 4: SCREENSHOT
Screenshot is an important and demanded feature with great enhancements in Windows 8. A user will hardly find any directed route to execute this feature.
SHORTCUT: Windows key + PrtSc (Print Screen)
FUNCTION 5: GLOBAL SEARCH
Windows 8 has introduced the feature of integrated search, through which, a user can explore the desired stuff at many spaces via a single search bar.
SHORTCUT: Windows key + Q
FUNCTION 6: SYSTEM PROPERTIES
System Properties page allows a user to view the basic information and rundown of his/her Windows Edition, PC specs, and Workgroup settings.
SHORTCUT: Windows key + Pause
FUNCTION 7: RUN COMMAND
Run command is a useful feature of Windows operating system, helping user to quick launch items, apps, and other routines.
SHORTCUT: Windows key + R
FUNCTION 8: QUICK ACCESS MENU
Quick Access menu exposes a user to system functionality such as Task Manager, Control Panel, Device Manager, Disc Management etc.
SHORTCUT: Windows key + X
FUNCTION 9: SETTINGS MENU
On the Charm bar, the last icon at the bottom leads to the Settings menu. Here a user can view and modify overall settings of a PC.
SHORTCUT: Windows key + I
FUNCTION 10: SHARE MENU
On the Charm bar, the second icon from the top leads to the Share menu. This menu contains some preset networks, where a user can easily share the select items.
SHORTCUT: Windows key + H
FUNCTION 11: DEVICES MENU
On the Charm bar, the fourth icon from the top leads to the Devices menu. This menu shows the affiliated and connected devices to the PC.
SHORTCUT: Windows key + K
FUNCTION 12: LANGUAGE
For non-natives, Windows always encompasses the feature of Languages and Keyboard Layout. You can now easily switch between certain layouts.
SHORTCUT: Windows key + spacebar
Learning these shortcuts will surely help you to reach out to apps quickly.
Windows 8 Restrict Charms Hint and Switcher Hot Corners
Charm bar is a valuable tool, presented by Windows 8 and preserved by Windows 8.1. It provides us with an easy access to certain aspects of our operating system. A Charm bar acquaints the user with Search, Share, Start screen, Devices, and Settings options. This is a tool appreciated by almost every user of Windows operating system. However, the appearance of this feature may not be a comfortable one.

To view the Charm bar, we usually point our cursor to the upper right corner of the screen. A user may point his/her cursor at this position, accidentally and constantly. It has been experienced that the ratio of intentionally pointing cursor at this point is far less than that of unintentional pointing. Consequently, a frequent appearance of Charm bar, when not required by the user, is considered annoying. An element with high utility, with a bad reputation, is not at all welcomed.
This is the reason this article has been generated. It entails the methods and procedures to avoid this behavior of Charm bar without even deactivating it. There are three different techniques to disable Charms Hint and Hot Corners, respectively. All three of them are listed, explained, and tutored below.
Disable Charms Hint
The sub heading noted above should not be confused with disabling the Charms bar. It just blocks the way Charm bar pops up, every time when the cursor is pointed at the top right corner of the screen. All you need to do is create a new registry key, with a new registry entry within it, instructing Charm bar to avoid popping up frequently. To get this thing done, execute the following steps in sequence.
- Go to the Windows Registry Editor
- Navigate of the following key, through HKEY_CURRENT_USER
- Software\Microsoft\Windows\CurrentVersion\ImmersiveShell
- Right click ImmersiveShell to create a New Key, naming it as EdgeUI
- Right Click EdgeUI to create a New DWORD Value. Rename this value as DisableCharmsHint
- Double click DisableCharmsHint to Modify, and put 1 as Value data
- Click Ok to save your changes, and Exit Registry Editor
Disable Top Right Corner
In the previous step, it was shown the way to prevent Charms bar to pop up, while pointing the cursor to the top right corner of the screen. It was also mentioned that there is a way to view the same bar by pointing the cursors to the corners, at different directions. However, some users may not want this even feature to exist. For such users, it is suggested to disable the top right corner to completely stopover the Charms bar with such occurrences. To do so, follow the steps outlined below.
- Expose to the Registry Editor, and navigate to the following key, through HKEY_CURRENT_USER
- Software\Microsoft\Windows\CurrentVersion\ImmersiveShell\EdgeUI
- Right click EdgeUI to create a New DWORD Value. Rename this value as DisableTRcorner
- Double click this registry entry to Modify, and put 1 as the Value data
- Click OK to save changes, and Exit the Registry Editor
Disable Top Left (or Bottom Left) Corner
Windows 8 users must have experienced a toggle between Desktop and Start, by pointing the cursor at the top-left or bottom-left corner of the screen. When you are on the Start screen, pointing the cursor at one of the said corners would show you a small image of your Desktop screen. Click on the same location will shift you from Start screen to Desktop screen, and Vice Versa. If you consider this feature irritating, rather than useful, you can block it through the below practice.
- Unfold Registry Editor, and navigate to the following key, through HKEY_CURRENT_USER
- Software\Microsoft\Windows\CurrentVersion\ImmersiveShell\EdgeUI
- Right click EdgeUI to create a New DWORD Value. Rename this value as DisableTLcorner
- Double click this registry entry to Modify, and put 1 as the Value data
- Click OK to save changes, and Exit the Registry Editor
Although, you block all the ways to view Charms bar by point cursor to the screen corners, there is still an easy and convenient way to pop it up. This is the shortcut key to Charms bar. Being whether on your Desktop screen or Start screen, press Windows key + C to pop up the Charms bar. To know more Windows 8 shortcuts,read this post.
10 Useful Specifics of Windows 7
You may have applied many tweaks to customize your Windows 7, or resolve major issues in it. And by now, you may have been considering yourself an effectual player of this operating system. Here is a gen, which even you may not be aware of. Scroll down to gain some startling facts about Windows 7:
Problem Steps Recorder
Introduced for the first time in Windows 7, Problem Steps Recorder proved to be a very useful feature. It captures images of the steps performed by the user on his/her computer. These images are then saved with a caption describing the detail of what you have been doing in that specific step. As inferred from its name, it is useful in reporting a problem to anyone professional. To work with it,
- Press Window key on your keyboard, type ‘PSR’, and hit Enter key
- Click on the red button to start recording. You can pause and stop recording from same area
- Click Add Comment button to include text entered, as recording does not display the text you write
Applocker
Applocker is a security tool that limits the access of non-administrative users to open or install an application. Applocker is usually activated on systems, which are supposed not to open or incorporate applications other than predefined ones. See following steps to learn how it works.
- Press Windows key, type ‘gpedit.msc’, and hit Enter. Access following path through the left pane
- Computer Configuration/Windows Settings/Security Settings/Application Control Policies/Applocker
- Access Executable rules of Applocker and right click to Create New Rule
- Complete the wizard to allow an application for an open or limited access
Switch to a Projector
In the previous versions of Windows operating system, earlier than Windows 7, it was not easy to connect and adjust a projector. The reason was differentiated display properties of each computer. But with Windows 7, you can perform this task within seconds. See below for the procedure
- Press Windows key on your keyboard, type ‘displayswitch’, and hit Enter
- Alternatively, Press Windows key and P at the same time.
- Among the four display options, choose the last one naming Projector only.
Network Support
Windows Live Movie Maker is a very proficient component of Windows. In Windows 7, it has reemerged with various improvements. However, it is still unable to import and play media from the network. As luck would have it, here is a solution to eliminate this problem.
- Go to Registry Editor, and in the left panel, access the following given path
- HKEY_CURRENT_USER\Software\Microsoft\Windows Live\Movie Make
- In this key, create new DWORD Value naming AllowNetworkFiles and set its Value data to 1
Fault Tolerant Heap
Fault Tolerant Heap, usually referred as FTH is a technology that detects instable processes (crashing applications) and fixes them spontaneously to avoid inconvenience in future. If your PC is not sheltered with FTH, activate it now through Windows Registry, as described below.
- Go to Registry Editor, and in the left panel, access the following given path
- HKEY_LOCAL_MACHINE\Software\Microsoft\FTH
- In this key, locate the entry named Enabled and make sure its Value data is set to 1
- List of FTH protected processes can be viewed in the State key within the FTH key
Customize Login Screen
You may not have imagined your login screen with a different appearance. Well FYI, it is possible to tweak your login screen and customize it, as you may like it. This is a hidden and rousing feature of Windows 7. For this purpose, you would have to edit your Windows Registry, in the following way.
- Go to Registry Editor, and access through HKEY_LOCAL_MACHINE to reach following key
- Software\Microsoft\Windows\CurrentVersion\Authentication\LogonUI\Background
- Locate the value named OEMBackground, and set its Value data to 1.
- Find a desired image, and rename it as backgroundDefault.jpg
- Copy the image to %windir%\system32\oobe\info\backgrounds, and Restart the computer
Large Text
Modern machines have advanced display properties with capability to show higher resolution. Even though, it is recommended by modern operating systems to set your systems on high resolution, so that you could get undistorted view. However, in such a case, reading text might become difficult for certain users. To resolve this issue with a simple way out,
- Press Windows key on your keyboard, type ‘DPIScaling’, and hit Enter
- In the appearing window, select a size increase according to your longing, and click the Apply button
- Restart your computer to make the changes in effect
Expand Taskbar Preview
Windows 7 introduced an exciting feature of displaying the minimized programs in a miniature view, while scrolling cursor on them. You can tweak this facility for a higher value, and increase the size of its preview. This can be achieved through following simple steps.
- Go to Registry Editor, and in the left panel, access the following given path
- HKEY_CURRENT_USER\Software\Microsoft\Windows\CurrentVersion\Explorer\Taskband
- Create a New DWORD Value, name it as MinThumbSizePx, and set its Value data to 350
- Reboot your system to view the changes
Play To
This feature is associated with Windows Media Player. By this term, it is denoted that you can now play a media on any other system in the network. It pushes the media file to the PCs on network, which allows such behavior. To make it in practice,
- Launch Windows Media Player, go to Stream, and click Turn on media streaming
- In the appearing dialog box, click again on Turn on media streaming button
- Go to stream, and click to check Allow remote control of my player, Allow remote control on this network, and Automatically allow devices to play my media
- Repeat the same steps on other computers on the network
- The right click the media file that you want to play on another system, access Play To menu and select the system from the list.
Run As
Usually, an administrator makes a number of user accounts with limited privileges, While, keeps the maximum authority with itself in administrators account. Suppose being an administrator, you need to operate a different user account, and want to carry out an activity not authorized in that account. Logging out and then back in or Switching user might be a lengthy deal. By the following means, you can do it easily.
- Right click the desired executable file by pressing the Shift key
- Choose the option Run as different user
- Input the admin username, password, and there you go
How to Deal with Print Spooler Error 1053
Print Spooler error 1053 is a printer error. A system facing such problem fails to execute print commands and shows this message as disclaimer. This type of error is usually anticipated to occur due to a virus infection or other malicious interference. But in actual, it has logical links with Microsoft Windows Updates. It is observed that the error is seen right after installing the updates.
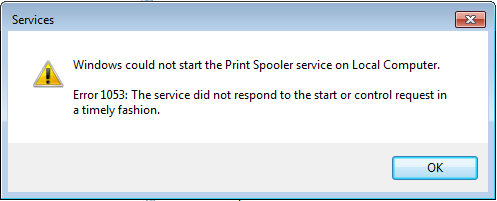
Other known error messages, associated with the same error code are; “Windows could not start the printer spooler service on local computer”; and “The service did not respond to the start or control request in a timely manner”.
Let us show you the entire mechanism behind this failure. While updating the print spooler service, it is accidently replaced with something else. To view its executable file, go to C:\Windows\System32. In this directory, locate the item, spoolsv.exe that signifies this service. If the concerned file is fewer than 100KB, there must be another file naming spoolsv.exe.org, which actually is the correct service file.
For an initial overhaul, first rename the file spoolsv.exe to spoolsv.bak, and then rename spoolsv.exe.org tospools.exe. Although, the issue is rectified in the newer Windows Updates, you can still conduct the error fix manually, in the following order.
- Point your cursor to the upper right corner of your desktop screen to view the Charms bar
- In the Charms bar, click on the Search icon to initiate a Search through Windows
- Windows 7 users can simply press Windows key to open Start menu containing Search box
- In the Search box, type ‘services.msc’ and hit Enter to open Services window
- In the right panel of Services, locate and select Print Spooler from the list
- Right click Print Spooler, and go to its Properties
- Go to the Log On tab, and uncheck the option Allow service to interact with desktop setting
- Now go to the General tab, and click the Start button
- Click OK to save your changes
- Exit Services window
- Restart your computer
After a reboot, try & give a print command to your printer. In all probability, the system will successfully print the pages you like without displaying 1053 code error again.
Subscribe to:
Posts (Atom)


